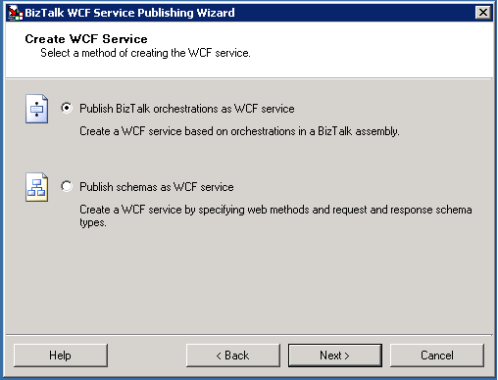
When you have a requirement to expose your orchestration as WCF service, Biztalk gives you two options.
First of all, Orchestration can be exposed as WCF service using these both options. But then what’s the difference?
Publishing schemas as web services allows you to separate the services you publish from the implementation. This this most useful for one-way operations, where a message is published each time the service is called. You can use this for a pure message based
scenario, or you can create orchestrations that subscribe to the messages using direct bound ports. You have more control over the service name and operation names. Whereas in Exposing orchestration as WCF, it is bound to the particular orchestration and whenever there is a change in the orchestration, the process has to be redeployed. So it is always better to expose schema’s as WCF.
When it comes to deploy these kinds of solutions in to production, questions arises as how to deploy the bizTalk stuffs and WCF stuffs. BizTalk Deployment Framework can be used to deploy both using a single MSI.
Steps:
- Expose the schema as WCF in your development environment, get the IIS content and copy in to your solution folder as VDir. Please take care of the length constraints of the path and name.
- Change your deployment framework .btdfproj file to accommodate IIS configuration.
- Make the following values as below
<IncludeVirtualDirectories>true</IncludeVirtualDirectories>
<SkipIISReset>false</SkipIISReset>
<UndeployIISArtifacts>true</UndeployIISArtifacts>
- Add an item group with IIS configuration details
<ItemGroup>
<VDirList Include=”*”>
<Vdir>NameOfVirtualDirectory</Vdir>
<Physdir>..\VirtualDirectoryFolder</Physdir>
<AppPool>AppPoolName</AppPool>
<AppPoolNetVersion>v4.0</AppPoolNetVersion>
</VDirList>
</ItemGroup>
- Add the below target to copy the WCF files in the virtual directory created
<Target Name=”CustomRedist”>
<MakeDir Directories=”$(RedistDir)\GetCustomerSchedule” />
<CreateItem Include=”..\VDir\**\*.*”>
<Output TaskParameter=”Include” ItemName=”SourceFiles” />
</CreateItem>
<Copy DestinationFolder=”$(RedistDir)\GetCustomerSchedule\%(RecursiveDir)” SourceFiles=”@(SourceFiles)”/>
</Target>
3. Modify the InstallWizrd.xml file to accommodate the app pool credentials
<SetEnvUIConfigItem>
<PromptText>
Enter a domain-qualified account name for virtual directory (HTTP and SOAP) identities.
For Windows Server 2003 (IIS6), ensure this user is in the IIS_WPG group.
</PromptText>
<PromptValue />
<ValueType>Text</ValueType>
<EnvironmentVarName>VDIR_UserName</EnvironmentVarName>
</SetEnvUIConfigItem>
<SetEnvUIConfigItem>
<PromptText>Enter the password for the account specified:</PromptText>
<PromptValue />
<ValueType>Password</ValueType>
<EnvironmentVarName>VDIR_UserPass</EnvironmentVarName>
</SetEnvUIConfigItem>
4. Now build the MSI and this MSI will be able to deploy both BizTalk and IIS configurations.

